1. 官方推荐生产环境配置
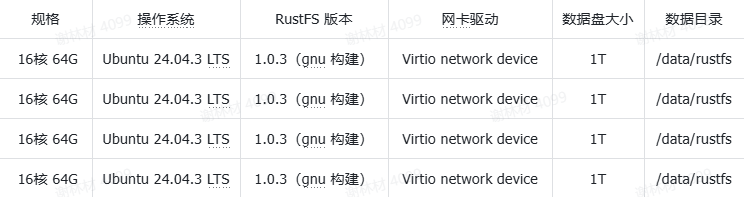
2. 基础环境配置
- 节点免密
ssh-keygen -t ed25519
for ip in ip1 ip2 ip3 ip3; do
  ssh-copy-id root@$ip
done

for ip in ip1 ip2 ip3 ip3; do
  ssh -o BatchMode=yes root@$ip hostname
done
- 主机名
hostnamectl set-hostname rustfs01 # 其余 3 台依次 rustfs02 / rustfs03 / rustfs04
- hosts 解析
grep -q rustfs01 /etc/hosts || printf '%s\n' \
  '172.16.10.143 rustfs01' \
  '172.16.10.144 rustfs02' \
  '172.16.10.145 rustfs03' \
  '172.16.10.146 rustfs04' >> /etc/hosts
cat /etc/hosts | grep rustfs
- 时区与时间同步
grep -q rustfs01 /etc/hosts || printf '%s\n' \
  '172.16.10.143 rustfs01' \
  '172.16.10.144 rustfs02' \
  '172.16.10.145 rustfs03' \
  '172.16.10.146 rustfs04' >> /etc/hosts
cat /etc/hosts | grep rustfs
3. 数据盘 XFS 初始化与挂载
官方强烈推荐数据盘用 XFS(-i size=512 -n ftype=1 + LABEL 标签);系统盘文件系统无需改动。 ext4→XFS 无原地转换,只能重格(mkfs 销毁盘上全部数据,有业务数据先导出)。 多盘机型:LABEL 与挂载点按序号扩展(RUSTFS1..N、/data/rustfs1..N),每盘一条 fstab。
- 数据盘直接初始化为 XFS
lsblk -d -o NAME,SIZE,TYPE,FSTYPE,MOUNTPOINT

# 1) 整盘直接格式化 XFS(参数为官方推荐:大 inode + ftype + 卷标)
mkfs.xfs -f -i size=512 -n ftype=1 -L RUSTFS1 /dev/vdb

# 2) 创建挂载点 + 写 fstab
mkdir -p /data
grep -q 'LABEL=RUSTFS1' /etc/fstab || echo 'LABEL=RUSTFS1 /data xfs defaults,noatime,nodiratime 0 2' >> /etc/fstab

# 3) 挂载
mount -a

# 4) 验证
findmnt /data      # 应显示: /dev/vdb  xfs  rw,noatime,nodiratime
blkid /dev/vdb     # 应显示: LABEL="RUSTFS1" TYPE="xfs"
4. 安装 RustFS
- 下载离线包
cd /tmp

curl -fsSL --retry 3 -o rustfs.zip \
  https://dl.rustfs.com/artifacts/rustfs/release/rustfs-linux-x86_64-gnu-latest.zip

unzip -oq rustfs.zip -d rustfs-pkg

install -m 755 rustfs-pkg/rustfs /usr/local/bin/rustfs

rustfs --version

rm -rf /tmp/rustfs.zip /tmp/rustfs-pkg
- 创建系统用户与目录
useradd --system --home-dir /var/lib/rustfs --shell /usr/sbin/nologin rustfs

id rustfs  # 验证: uid=999(rustfs) gid=...(rustfs)

# 配置/日志/运行目录
mkdir -p /etc/rustfs /var/log/rustfs /var/lib/rustfs

# 数据目录
mkdir -p /data/rustfs1
chown rustfs:rustfs /data/rustfs1 /var/log/rustfs /var/lib/rustfs
ls -ld /data/rustfs1                     # 属主应为 rustfs:rustfs
- 写集群配置 /etc/rustfs/rustfs.env
cat > /etc/rustfs/rustfs.env <<'EOF'
RUSTFS_VOLUMES="http://ip1:9000/data/rustfs1 http://ip2:9000/data/rustfs1 http://ip3:9000/data/rustfs1 http://ip4:9000/data/rustfs1"
RUSTFS_ADDRESS="0.0.0.0:9000"
RUSTFS_CONSOLE_ENABLE="true"
RUSTFS_CONSOLE_ADDRESS="0.0.0.0:9001"
RUSTFS_ACCESS_KEY="rustfs-prod"
RUSTFS_SECRET_KEY="强密钥"
RUSTFS_OBS_LOGGER_LEVEL="info"
RUSTFS_OBS_LOG_DIRECTORY="/var/log/rustfs"
EOF

chmod 600 /etc/rustfs/rustfs.env
cat /etc/rustfs/rustfs.env
- 配置 systemd 服务
cat > /etc/systemd/system/rustfs.service <<'EOF'
[Unit]
Description=RustFS distributed object storage
Documentation=https://docs.rustfs.com
After=network-online.target
Wants=network-online.target
RequireMountsFor=/data/rustfs1

[Service]
Type=simple
User=rustfs
Group=rustfs
EnvironmentFile=/etc/rustfs/rustfs.env
EnvironmentFile=-/etc/rustfs/rustfs.env.local
ExecStart=/usr/local/bin/rustfs server
Restart=always
RestartSec=5s
LimitNOFILE=1048576
LimitNPROC=262144
TasksMax=infinity
OOMScoreAdjust=-500
WorkingDirectory=/var/lib/rustfs

[Install]
WantedBy=multi-user.target
EOF

systemctl daemon-reload
systemctl enable rustfs.service     # 开机自启
systemctl cat rustfs | head -5      # 验证单元已加载
5. 内核参数与句柄限制
cat > /etc/sysctl.d/99-rustfs.conf <<'EOF'
# RustFS 生产内核参数
net.core.somaxconn = 4096
net.core.rmem_max = 16777216
net.core.wmem_max = 16777216
net.ipv4.tcp_rmem = 4096 87380 16777216
net.ipv4.tcp_wmem = 4096 65536 16777216
net.ipv4.ip_local_port_range = 1024 65535
vm.swappiness = 10
fs.file-max = 2097152
EOF
sysctl --system >/dev/null && echo sysctl已应用
sysctl net.core.somaxconn vm.swappiness      # 验证: 4096 / 10

cat > /etc/security/limits.d/99-rustfs.conf <<'EOF'
rustfs soft nofile 1048576
rustfs hard nofile 1048576
EOF
6. 启动集群
systemctl start rustfs
systemctl enable rustfs
systemctl is-active rustfs               # active(首次可能短暂 activating, 属正常)
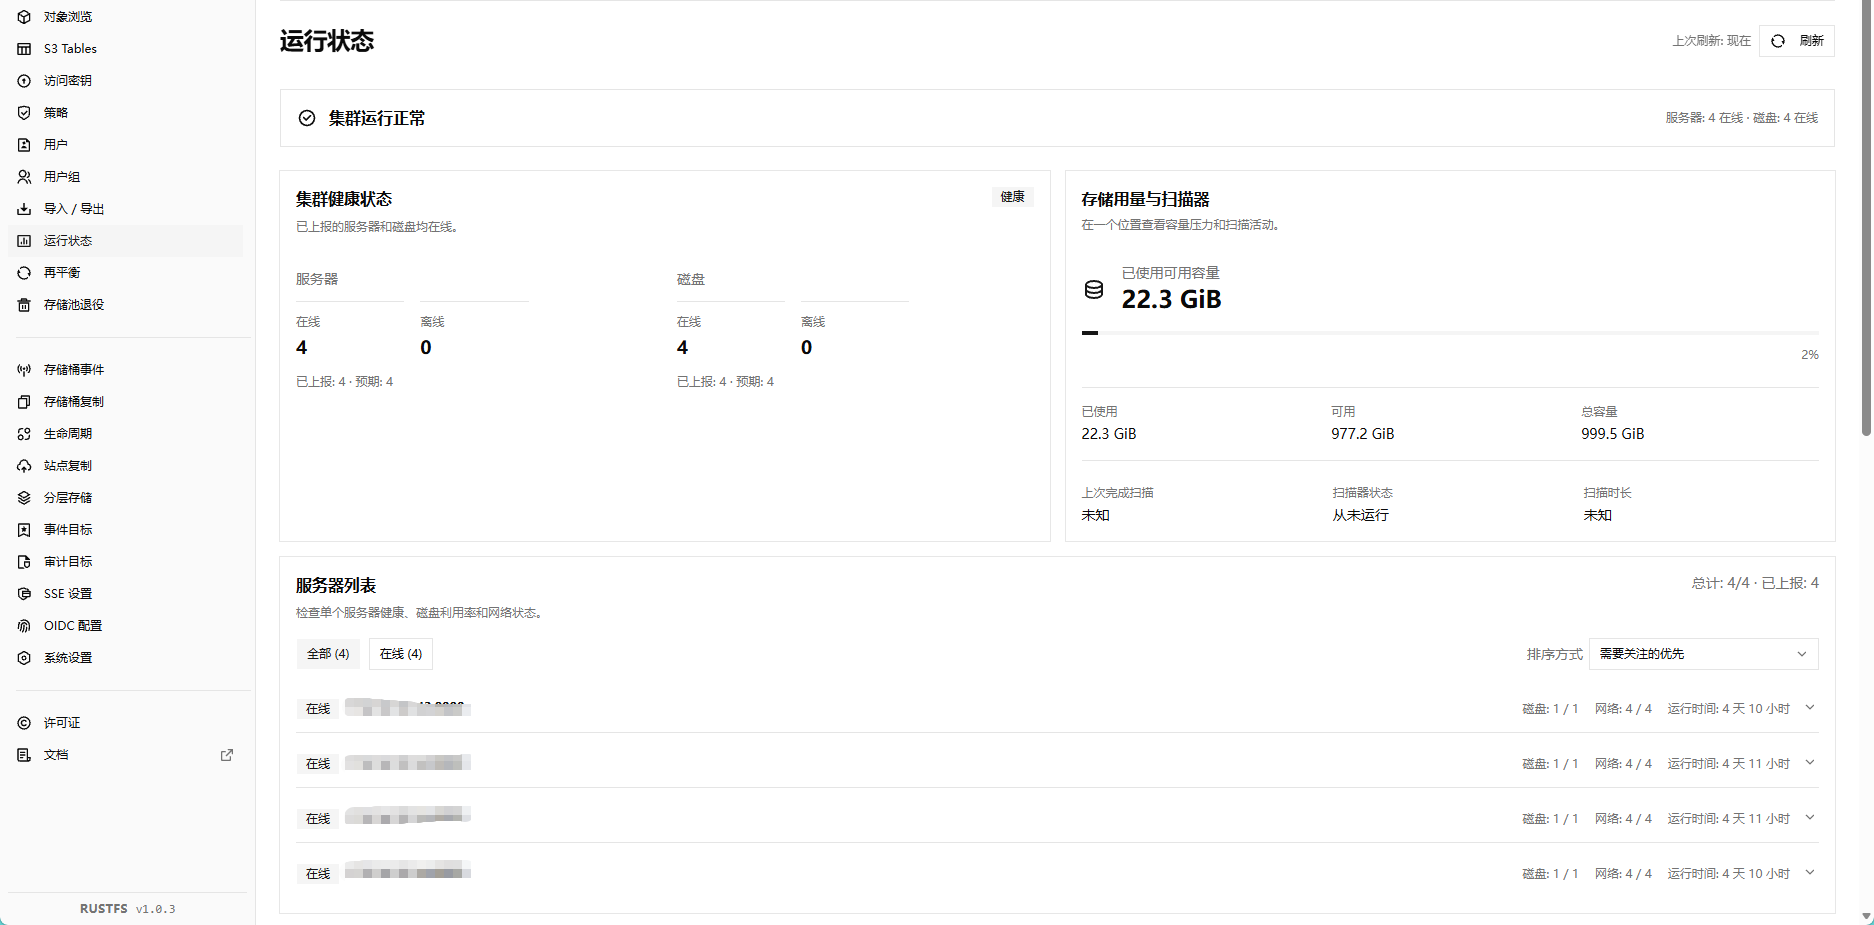
7. 部署验证
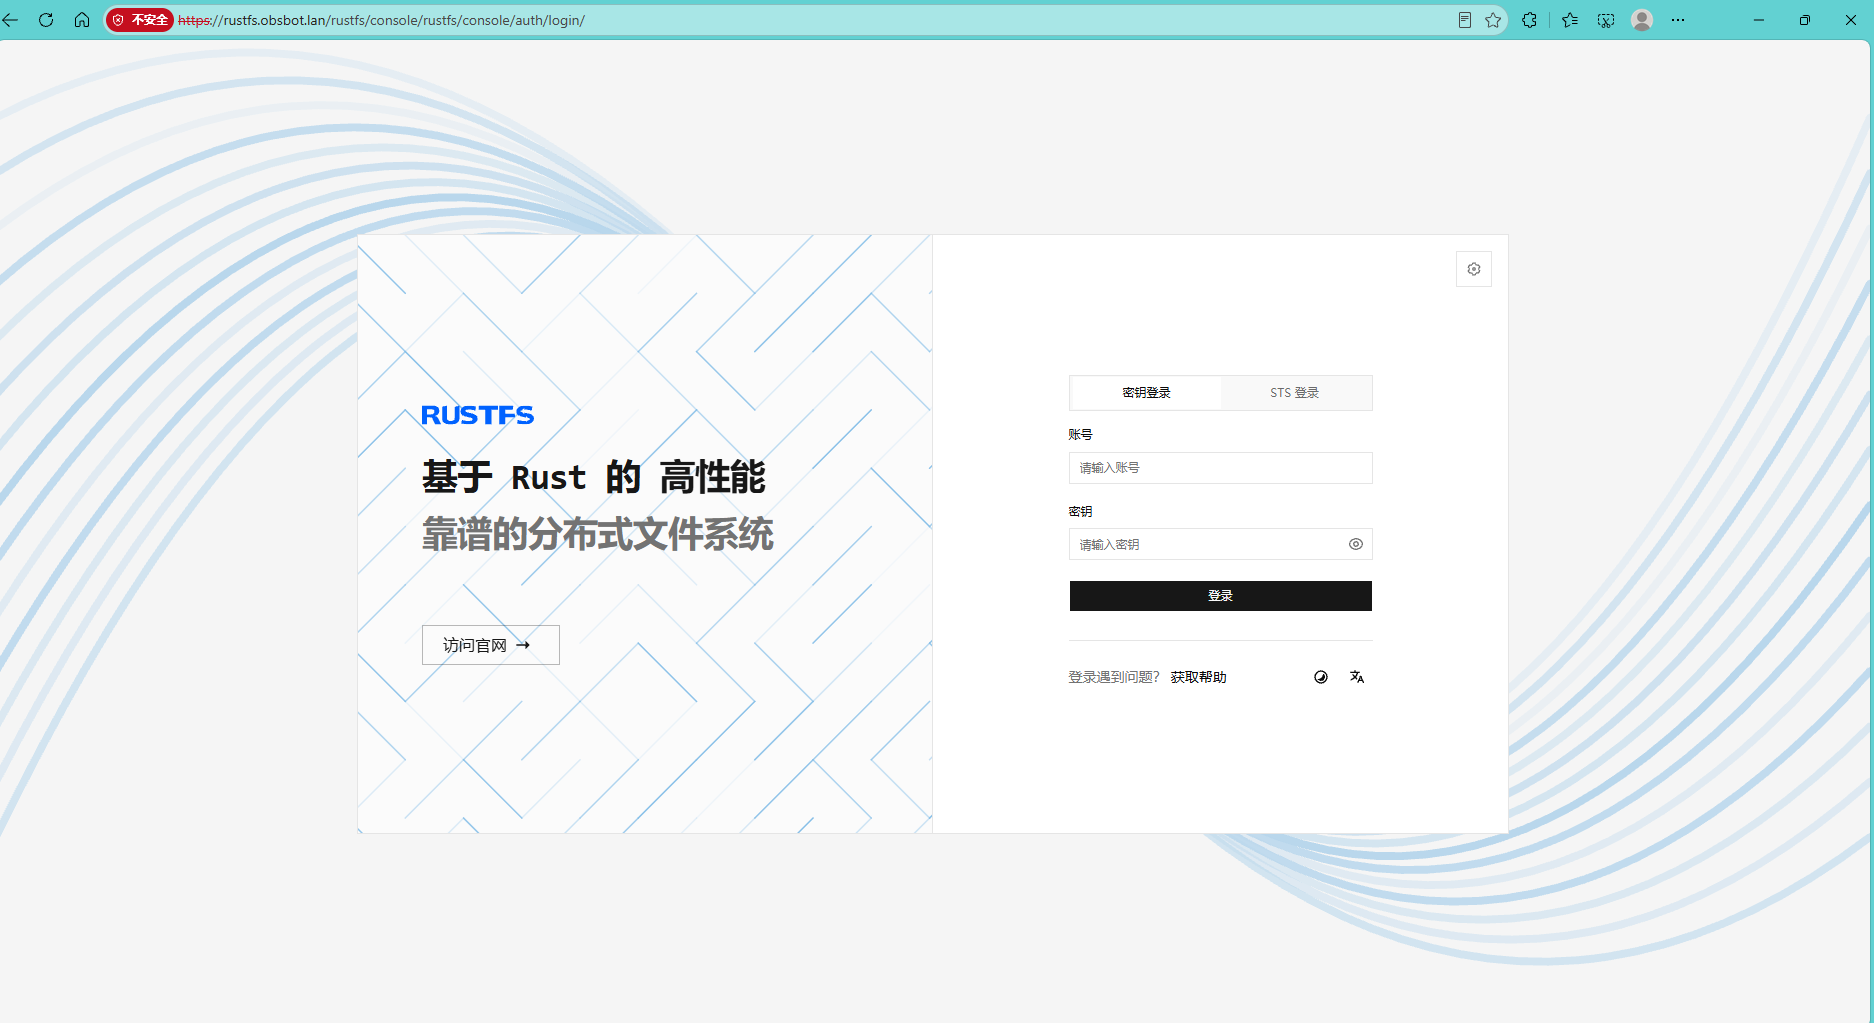
systemctl status rustfs --no-pager | head -5
curl -fsS http://127.0.0.1:9000/health && echo " API健康OK"
curl -fsS -o /dev/null -w 'console=%{http_code}\n' http://127.0.0.1:9001/rustfs/console/health
ss -ltn | grep -E ':(9000|9001)\b'       # 两个端口都应在 LISTEN
Comments & discussion
The first comment in each thread opens a topic. Signed-in readers can keep the conversation going under that topic.
No comments yet. Sign in to start a topic.
Start a new topic
Sign in to start a topic or join the discussion.